Blog
Common Embroidery Digitizing Mistakes & How to Avoid Them
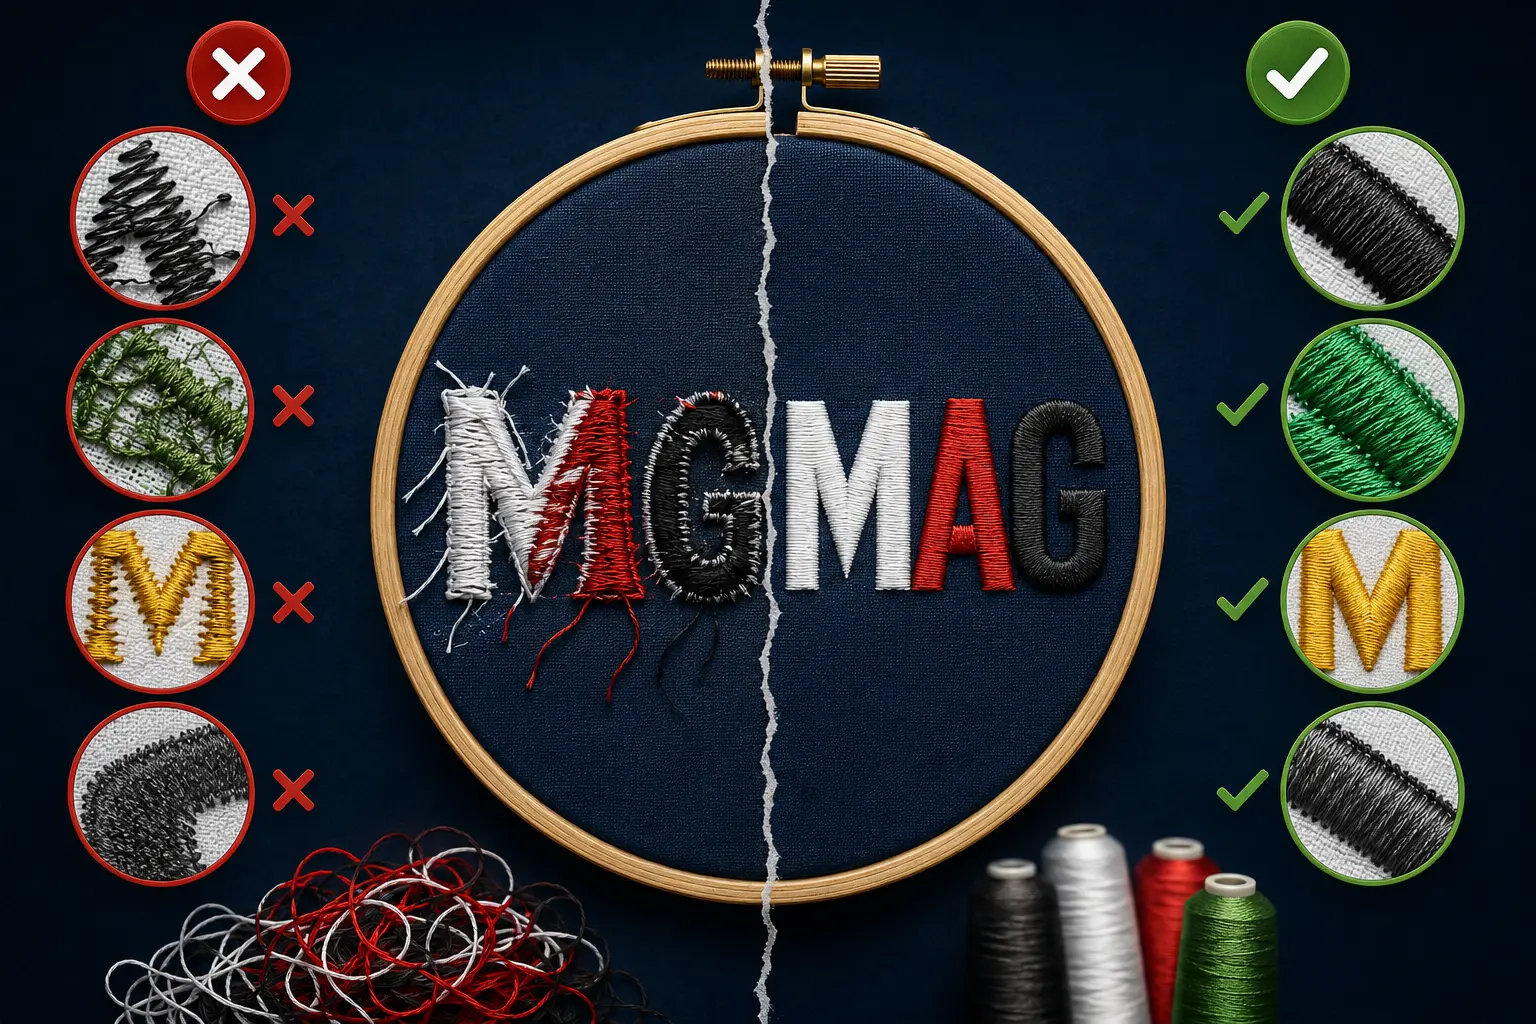
Embroidery digitizing is one of the most important steps in creating clean, professional, and machine-ready embroidery designs. Even a great logo or artwork can produce poor embroidery results if the digitizing is not done correctly. From thread breaks and puckering to distorted designs and uneven stitching, small digitizing mistakes can affect the final embroidery quality significantly.
Whether you are running an embroidery business, creating branded apparel, or ordering custom embroidery for your company, understanding the most common embroidery digitizing mistakes can help you achieve better and smoother embroidery results.
In this guide, we’ll explain the most common embroidery digitizing mistakes and how to avoid them for high-quality embroidery production.
What is Embroidery Digitizing?
Embroidery digitizing is the process of converting artwork, logos, or images into a digital embroidery file that embroidery machines can read and stitch. A professional digitizer manually sets stitch types, stitch directions, density, underlay, compensation, sequencing, and other settings to ensure the design sews out properly on fabric.
Good digitizing creates:
- Clean embroidery
- Smooth stitching
- Proper fabric stability
- Minimal thread breaks
- Sharp details
- Professional finish
Poor digitizing often causes embroidery issues that waste time, thread, fabric, and production costs.
1. Using Excessive Stitch Density
One of the most common embroidery digitizing mistakes is using too much stitch density.
When stitches are packed too closely together, the fabric becomes stiff and unstable. This often leads to:
- Thread breaks
- Needle breaks
- Fabric puckering
- Poor embroidery appearance
- Uneven stitching
Many beginner digitizers believe higher density creates better coverage, but excessive density actually damages embroidery quality.
How to Avoid It
Professional digitizers adjust stitch density according to:
- Fabric type
- Thread type
- Design size
- Stitch type
Balanced density creates smooth, clean embroidery without overloading the fabric.
2. Incorrect Underlay Settings
Underlay stitches act as the foundation of embroidery. Without proper underlay, the top stitches may shift, sink, or distort during production.
Poor underlay can cause:
- Uneven embroidery
- Gaps in stitching
- Design movement
- Loss of detail
- Poor fabric stability
How to Avoid It
Different designs require different underlay types, such as:
- Edge walk underlay
- Zigzag underlay
- Center walk underlay
Professional embroidery digitizing ensures the correct underlay is used based on the fabric and design requirements.
3. Wrong Stitch Direction
Stitch direction plays a major role in embroidery appearance and texture. Incorrect stitch angles can make designs look distorted, uneven, or inconsistent.
Improper stitch direction often causes:
- Gaps in embroidery
- Poor coverage
- Distorted text or shapes
- Unnatural design flow
How to Avoid It
Experienced digitizers carefully choose stitch angles to:
- Improve design flow
- Increase visual depth
- Reduce gaps
- Create smoother embroidery
Proper stitch direction also improves the overall professional look of the embroidery.
4. Ignoring Push & Pull Compensation
During embroidery, stitches naturally push and pull the fabric. If compensation is not applied correctly, designs may sew out differently than intended.
This often results in:
- Small text becoming unreadable
- Gaps between elements
- Misaligned borders
- Distorted shapes
How to Avoid It
Professional digitizers use push and pull compensation to adjust stitch paths and maintain accurate embroidery shapes after stitching.
This is especially important for:
- Small lettering
- Detailed logos
- Complex embroidery designs
5. Making Small Details Too Complex
Many designs contain tiny details that embroidery machines cannot reproduce properly. Trying to stitch extremely small elements often creates messy embroidery.
Common issues include:
- Blurred text
- Thread buildup
- Loss of detail
- Poor readability
How to Avoid It
Professional embroidery digitizing simplifies small details while preserving the overall design appearance.
This may include:
- Enlarging small text
- Reducing unnecessary details
- Adjusting stitch types
- Improving spacing
Simplified designs usually produce cleaner and more professional embroidery results.
6. Using the Wrong Stitch Type
Different embroidery elements require different stitch types. Using the wrong stitch type can negatively affect embroidery quality.
Examples include:
- Satin stitches for thin borders and text
- Fill stitches for large areas
- Running stitches for outlines and details
Using incorrect stitch types may lead to:
- Poor coverage
- Uneven texture
- Weak embroidery structure
How to Avoid It
Experienced digitizers select stitch types based on:
- Design shape
- Fabric
- Size
- Embroidery purpose
Proper stitch selection improves both durability and appearance.
7. Poor Digitizing for Different Fabrics
Not all fabrics behave the same during embroidery. A design that works well on caps may not sew properly on stretch fabrics or jackets.
Different fabrics require different digitizing adjustments.
Common fabric-related issues:
- Puckering on thin fabrics
- Distortion on stretchy garments
- Misalignment on caps
- Poor stitch appearance on thick materials
How to Avoid It
Professional embroidery digitizers adjust:
- Density
- Underlay
- Compensation
- Stitch direction
according to the specific fabric type.
This ensures smoother embroidery on:
- Caps
- Polo shirts
- Jackets
- Hoodies
- Towels
- Bags
8. Auto Digitizing Instead of Manual Digitizing
Auto digitizing software may seem fast and convenient, but it often creates low-quality embroidery files with poor stitch paths and incorrect settings.
Auto digitized designs commonly produce:
- Excessive trims
- Poor stitch flow
- Uneven density
- Distorted embroidery
How to Avoid It
Manual embroidery digitizing provides:
- Better stitch control
- Cleaner embroidery
- Improved accuracy
- Professional-quality results
Professional manual digitizing is always recommended for logos, branding, and commercial embroidery.
9. Poor Pathing & Sequencing
Bad embroidery sequencing creates unnecessary trims and jumps, slowing production and reducing embroidery quality.
This may cause:
- Extra thread cuts
- Longer production time
- Messy embroidery backs
- Increased thread waste
How to Avoid It
Professional digitizers optimize stitch sequencing to:
- Reduce trims
- Improve efficiency
- Create cleaner embroidery
- Speed up machine production
Efficient pathing is especially important for commercial embroidery production.
10. Not Testing the Design Properly
Even well-digitized designs should always be tested before final production.
Skipping test runs may lead to:
- Unexpected stitching problems
- Production delays
- Material waste
- Customer dissatisfaction
How to Avoid It
Professional embroidery files should always be tested on actual fabric before full production.
Testing helps identify:
- Density issues
- Alignment problems
- Thread breaks
- Fabric distortion
This ensures high-quality embroidery results every time.
Why Professional Embroidery Digitizing Matters
Professional embroidery digitizing is not just about converting artwork into stitches. It requires technical knowledge, embroidery experience, and an understanding of machine behavior, fabrics, stitch types, and production efficiency.
A professionally digitized embroidery file provides:
- Cleaner stitching
- Better embroidery quality
- Reduced thread breaks
- Faster production
- Professional appearance
- Improved durability
High-quality digitizing saves time, reduces production problems, and delivers better results for businesses and customers.
Final Thoughts
Embroidery digitizing mistakes can significantly affect embroidery quality, machine performance, and customer satisfaction. Problems like excessive density, poor underlay, incorrect stitch direction, and bad sequencing often lead to production issues and unprofessional embroidery results.
Understanding these common embroidery digitizing mistakes and how to avoid them can help improve embroidery quality, reduce machine problems, and create cleaner, more professional designs.
If you want smooth, high-quality embroidery results, professional manual embroidery digitizing is always the best choice.
At MAG Digitizing, we create clean, production-ready embroidery files optimized for smooth machine performance, proper density, clean stitch paths, and professional embroidery results across all major embroidery formats including DST, PES, EXP, JEF, VP3, and more.