Blog
What Is Embroidery Digitizing? A Complete Beginner’s Guide
Embroidery is one of the most professional and long-lasting ways to display a logo, design, name, or artwork on fabric. From company uniforms and caps to jackets, patches, towels, and promotional products, embroidery gives a premium and high-quality look that printing often cannot match.
But before an embroidery machine can stitch your logo or design, the artwork must be converted into a special machine-readable file. This process is called embroidery digitizing.
Many beginners think embroidery digitizing simply means converting a JPG or PNG into another file format. In reality, it is much more detailed than that. Embroidery digitizing is the process of manually creating stitch instructions that tell the embroidery machine exactly how to sew the design.
A professionally digitized file controls stitch direction, stitch type, density, underlay, trims, color changes, and the complete sewing path. Without proper digitizing, even a beautiful logo can turn into messy stitches, broken threads, fabric puckering, or poor embroidery results.
In this beginner’s guide, we will explain what embroidery digitizing is, how it works, why it matters, and what you should know before ordering digitizing for your design.
What Is Embroidery Digitizing?
Embroidery digitizing is the process of converting artwork into a machine embroidery file that an embroidery machine can read and stitch.
The artwork can be a:
- Logo
- Text
- Drawing
- Sketch
- Image
- Vector file
- Badge design
- Patch design
- Brand artwork
- Custom illustration
A digitizer uses professional embroidery software to recreate the artwork using different stitch types. The final file contains instructions for the embroidery machine, including where to start, where to stop, what stitch type to use, how dense the stitches should be, and when to change thread colors.
The embroidery machine does not understand normal image files like JPG, PNG, PDF, SVG, AI, or EPS directly. These files only show the visual design. The machine needs a stitch file such as DST, PES, EXP, JEF, VP3, HUS, or another embroidery format.
In simple words, embroidery digitizing turns your design into a stitch map for the embroidery machine.
Why Embroidery Digitizing Is Important
Embroidery digitizing is important because the quality of the final embroidery depends heavily on the quality of the digitized file.
A machine can only follow the instructions inside the embroidery file. If the file is poorly digitized, the machine will stitch poorly. If the file is properly digitized, the machine can produce clean, smooth, and professional embroidery.
Good embroidery digitizing helps with:
- Clean stitch quality
- Smooth edges
- Proper thread flow
- Accurate logo shape
- Better small text readability
- Fewer thread breaks
- Less fabric puckering
- Better design alignment
- Professional finished results
Poor digitizing can cause:
- Uneven stitches
- Gaps in the design
- Thick and hard embroidery
- Thread breaks
- Needle breaks
- Distorted logos
- Rough edges
- Misaligned details
- Wasted garments
This is why professional digitizing is essential for business logos, uniforms, caps, patches, and custom embroidery projects.
Is Embroidery Digitizing the Same as Converting a File?
No, embroidery digitizing is not the same as simple file conversion.
A normal file conversion changes one digital format into another, such as PNG to JPG or PDF to SVG. But embroidery digitizing requires creating stitch instructions manually or professionally using embroidery software.
For example, if you have a logo in PNG format, you cannot simply rename it to DST or PES. The embroidery machine still would not know how to stitch it properly.
A professional digitizer must decide:
- Which stitch types to use
- Where the stitching should start
- Which direction the stitches should follow
- How much underlay is needed
- How dense the stitches should be
- How to handle small details
- How to reduce thread trims
- How to make the design suitable for fabric
This is why embroidery digitizing is a skill-based process, not just a file conversion.
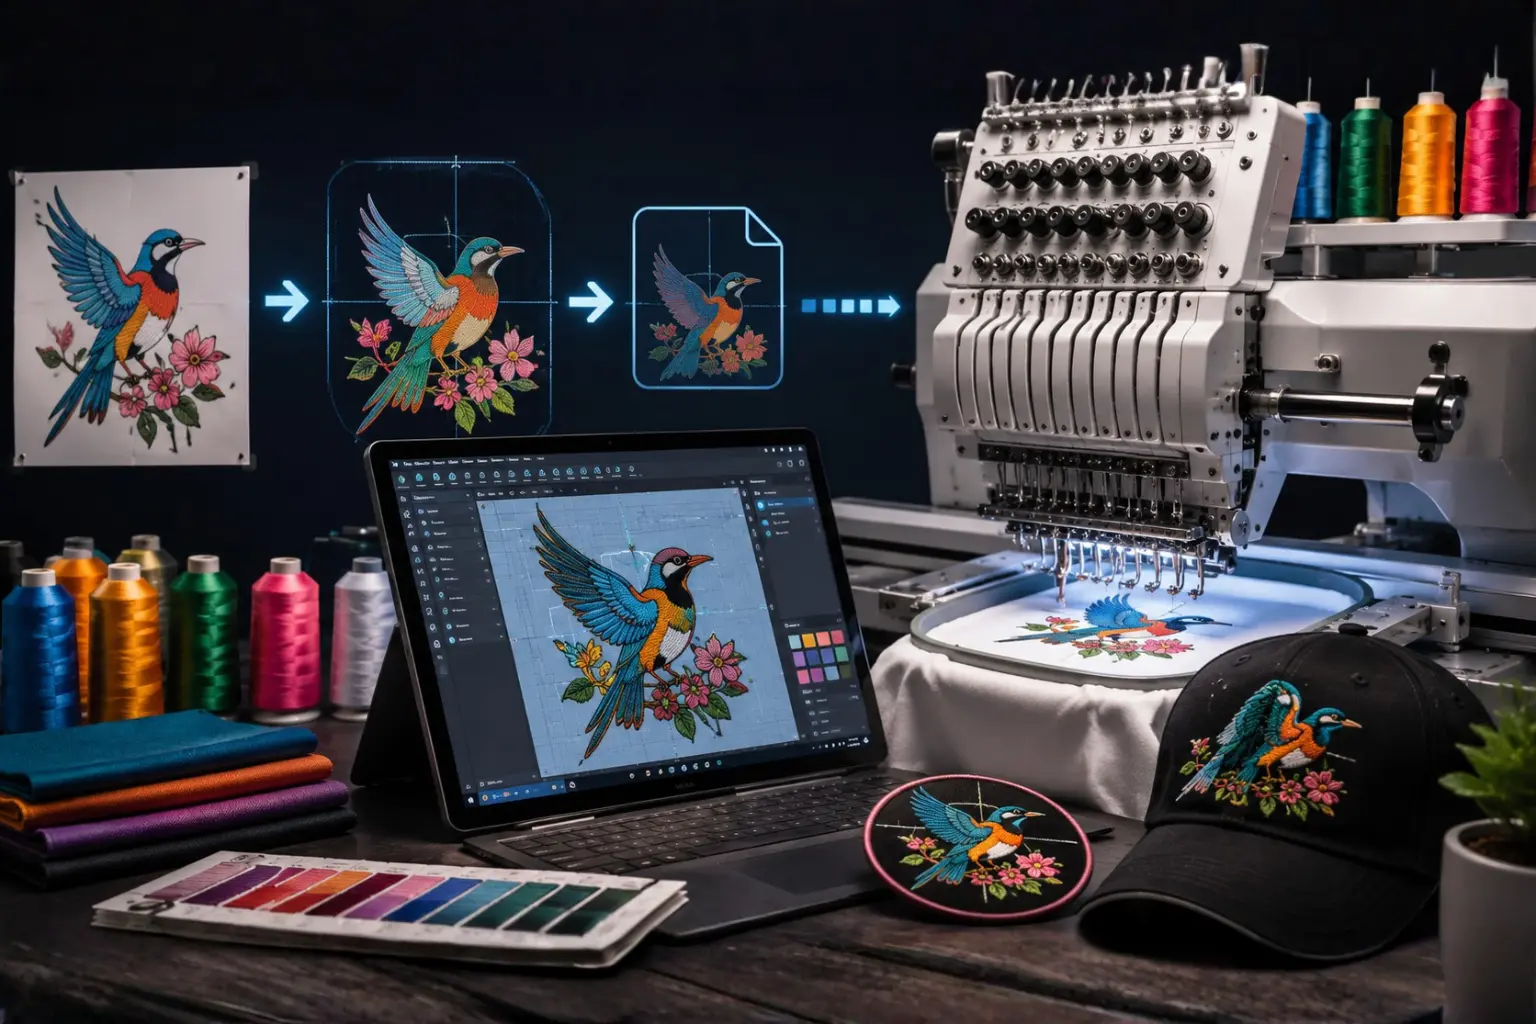
How Embroidery Digitizing Works
The embroidery digitizing process involves several important steps. Each step affects the final embroidery quality.
1. Artwork Review
The first step is reviewing the artwork. The digitizer checks the design to understand its details, shape, size, colors, and embroidery requirements.
The artwork may be provided as:
- JPG
- PNG
- SVG
- AI
- EPS
- PSD
- Hand-drawn sketch
High-quality artwork is always better, but a skilled digitizer can also work with low-resolution images in many cases.
During this step, the digitizer checks whether the design is suitable for embroidery. Some very tiny details, thin lines, or small text may need to be adjusted because embroidery uses thread, not ink.
2. Choosing the Design Size
The final embroidery size is very important. A design digitized for a 4-inch left chest logo may not work properly if resized to 10 inches for a jacket back without adjustments.
Common embroidery sizes include:
- Left chest logo: around 3 to 4 inches wide
- Cap front: around 4 to 5 inches wide
- Sleeve logo: around 2 to 3 inches wide
- Jacket back: around 8 to 12 inches wide
- Patch design: depends on patch shape and use
The digitizer creates the stitch file based on the required final size. This helps keep stitch density, spacing, and details balanced.
3. Selecting Stitch Types
Embroidery designs are made using different stitch types. Each stitch type has a different purpose.
The most common stitch types are:
Satin Stitch
Satin stitch is commonly used for text, borders, outlines, and narrow design elements. It creates a smooth, raised, shiny appearance.
Best for:
- Small text
- Borders
- Outlines
- Thin shapes
- Logo details
Fill Stitch
Fill stitch is used for larger areas of a design. It fills big shapes with rows of stitches.
Best for:
- Large letters
- Background areas
- Big logo sections
- Patches
- Jacket back designs
Running Stitch
Running stitch is a simple line stitch used for fine details, outlines, or decorative effects.
Best for:
- Fine lines
- Detail work
- Simple outlines
- Light decorative stitching
A professional digitizer chooses the right stitch type for each part of the design to make sure the final embroidery looks clean and balanced.
4. Setting Stitch Direction
Stitch direction controls the angle and flow of the stitches. This affects the texture, shine, and overall appearance of the embroidery.
Good stitch direction can make a design look more dimensional and professional. Poor stitch direction can make the design look flat, rough, or uneven.
For example, in a logo with multiple shapes, the digitizer may use different stitch angles to separate each area visually. This helps the embroidery look cleaner and more detailed.
5. Adding Underlay Stitches
Underlay stitches are hidden stitches placed under the main embroidery. They help stabilize the fabric and support the top stitches.
Underlay is important because it helps:
- Hold the fabric in place
- Reduce puckering
- Improve stitch coverage
- Support satin stitches
- Create smoother edges
- Improve overall embroidery quality
Different fabrics require different underlay settings. For example, stretchy fabric may need stronger underlay than stable cotton fabric.
6. Adjusting Stitch Density
Stitch density means how close the stitches are to each other. If the density is too high, the embroidery can become too thick and stiff. If the density is too low, the fabric may show through the design.
Proper density is one of the most important parts of embroidery digitizing.
Correct stitch density helps prevent:
- Thread breaks
- Needle breaks
- Fabric puckering
- Hard embroidery
- Gaps in stitches
- Poor coverage
A professional digitizer adjusts density based on the design, fabric, thread type, and final size.
7. Adding Pull Compensation
When stitches are sewn into fabric, the thread naturally pulls the fabric slightly. This can make the design look narrower or distorted. Pull compensation is used to adjust the design so it stitches correctly after the thread pulls.
Pull compensation is especially important for:
- Small text
- Satin columns
- Circles
- Borders
- Logos
- Stretchy fabrics
- Cap embroidery
Without proper pull compensation, circles can become oval, letters can become thin, and outlines may not align properly.
8. Setting Color Changes and Trims
Embroidery machines follow a color sequence. The digitizer sets the order of thread colors and trims to make the stitching process smoother.
Good color sequencing helps:
- Reduce unnecessary trims
- Save production time
- Improve design cleanliness
- Reduce thread jumps
- Make the embroidery easier to run
For commercial embroidery, efficient color sequencing can make a big difference in production speed.
9. Exporting the Machine File
After the design is digitized, it is exported into the embroidery file format required by the machine.
Popular embroidery file formats include:
- DST
- PES
- EXP
- JEF
- VP3
- HUS
- XXX
- SEW
Different embroidery machines need different file formats. For example, Brother machines commonly use PES, Janome machines commonly use JEF, and many commercial machines use DST.
10. Testing the Design
A test stitch is highly recommended before full production. Testing helps check the design on real fabric before stitching it on final garments.
A test stitch can reveal:
- Density issues
- Small text problems
- Thread breaks
- Alignment problems
- Fabric puckering
- Color sequence issues
- Missing details
Professional embroidery digitizing is not only about creating the file. It is also about making sure the file works well in real embroidery production.
Common Embroidery File Formats
Embroidery machines use different file formats depending on the brand and model.
Here are some common formats:
| File Format | Commonly Used For |
|---|---|
| DST | Tajima, Barudan, commercial machines |
| PES | Brother, Baby Lock |
| JEF | Janome |
| EXP | Melco, Bernina |
| VP3 | Husqvarna Viking, Pfaff |
| HUS | Husqvarna Viking |
| XXX | Singer |
| SEW | Older Janome and Elna machines |
| EMB | Editable Wilcom digitizing file |
If you are unsure which format you need, check your embroidery machine manual or ask your digitizing provider.
What Types of Designs Need Embroidery Digitizing?
Almost any design that needs to be stitched on fabric requires digitizing.
Common designs include:
- Business logos
- Brand logos
- School logos
- Sports team logos
- Monograms
- Name text
- Patches
- Cap designs
- Jacket back designs
- Uniform logos
- Custom artwork
- Badge designs
- Promotional product designs
Whether the design is simple or complex, it must be properly digitized before embroidery.
Embroidery Digitizing for Logos
Logo digitizing is one of the most common types of embroidery digitizing. Businesses use embroidered logos for uniforms, caps, polo shirts, jackets, bags, and promotional items.
A logo must be digitized carefully because it represents the brand. The shapes, text, spacing, and colors should be as clean and accurate as possible.
For logo digitizing, the digitizer must pay attention to:
- Small text
- Clean borders
- Brand colors
- Letter spacing
- Design balance
- Stitch direction
- Fabric type
- Final size
A properly digitized logo gives a professional look and helps businesses create a strong brand identity.
Embroidery Digitizing for Caps
Cap embroidery is different from flat embroidery because caps have a curved surface. This makes digitizing more challenging.
Cap designs usually need special settings because the machine stitches on a curved frame. The digitizer may need to start stitching from the center and move outward to reduce distortion.
Cap digitizing requires attention to:
- Design size
- Center-out stitching
- Proper underlay
- Pull compensation
- Stitch direction
- Small text readability
- Reduced density
A design that works well on a flat shirt may need adjustments before it works properly on a cap.
Embroidery Digitizing for Patches
Patch digitizing is used for custom embroidered patches. Patches often have borders and dense fill areas.
Common patch elements include:
- Merrow-style borders
- Satin borders
- Fill stitch backgrounds
- Text
- Logos
- Icons
- Shapes
Patch digitizing must be strong, clean, and balanced because patches are often used for uniforms, clubs, teams, businesses, and promotional branding.
Embroidery Digitizing for Small Text
Small text is one of the most difficult parts of embroidery digitizing. Very small letters can lose clarity if they are not digitized properly.
For small text, the digitizer must use:
- Proper stitch type
- Correct letter spacing
- Suitable thread density
- Clean stitch direction
- Minimal trims
- Proper pull compensation
Not every font works well for embroidery. Simple, bold fonts usually stitch better than thin or highly decorative fonts.
What Makes a Good Embroidery Digitized File?
A good digitized embroidery file should be clean, smooth, and machine-friendly.
A high-quality digitized file should have:
- Clean stitch paths
- Proper underlay
- Correct density
- Smooth stitch flow
- Accurate design shape
- Good pull compensation
- Minimal unnecessary trims
- Proper color sequence
- Clear small text where possible
- Compatibility with the required machine format
The goal is not just to make the design look good on screen. The goal is to make it stitch well on fabric.
What Makes a Bad Embroidery Digitized File?
A poorly digitized file can cause many problems during embroidery production.
Signs of bad digitizing include:
- Too many thread breaks
- Uneven stitches
- Rough edges
- Fabric puckering
- Gaps in the design
- Poor small text
- Misaligned outlines
- Excessive trims
- Very thick stitching
- Design distortion
- Machine errors
Bad digitizing can waste time, thread, stabilizer, and garments. That is why professional digitizing is worth it, especially for business and customer orders.
Can Any Image Be Digitized for Embroidery?
Most images can be digitized, but not every detail can always be stitched exactly as it appears on screen.
Embroidery has physical limitations because it uses thread. Very tiny details, thin lines, gradients, shadows, and small text may need to be simplified.
For best results, the design may need adjustments such as:
- Thickening thin lines
- Simplifying tiny details
- Increasing text size
- Removing unnecessary shadows
- Reducing color complexity
- Adjusting spacing
- Cleaning rough edges
A professional digitizer knows how to keep the design attractive while making it suitable for embroidery.
Difference Between Embroidery Digitizing and Vector Art
Embroidery digitizing and vector art are related but not the same.
Vector art is used for clean, scalable artwork. It is commonly used for printing, cutting, signs, and graphic design. Vector files include formats like AI, EPS, SVG, and PDF.
Embroidery digitizing creates stitch files for embroidery machines. These files include formats like DST, PES, JEF, EXP, VP3, and HUS.
A vector file can help the digitizer create a cleaner embroidery file, but it still needs to be digitized before it can be stitched.
In simple words:
- Vector art is for clean graphics.
- Embroidery digitizing is for machine stitching.
Manual Digitizing vs Auto Digitizing
Some embroidery software offers auto-digitizing, which automatically converts artwork into stitches. While this may work for very simple designs, it usually does not produce the best results for professional embroidery.
Manual digitizing gives better control over:
- Stitch types
- Stitch direction
- Density
- Underlay
- Trims
- Pull compensation
- Small text
- Fabric behavior
- Overall stitch quality
Auto-digitizing may create unnecessary stitches, poor direction, bad density, and rough results.
For professional logos, uniforms, caps, and business embroidery, manual digitizing is usually the better choice.
How Much Does Embroidery Digitizing Cost?
Embroidery digitizing cost depends on the design complexity, size, number of colors, detail level, and turnaround time.
Simple text or basic logos may cost less, while complex designs, patches, detailed artwork, or jacket back designs may cost more.
Factors that affect digitizing price include:
- Design complexity
- Number of details
- Design size
- Stitch count
- Small text
- Required file formats
- Cap or flat embroidery
- Turnaround time
A good digitizing service should provide clear pricing and high-quality output.
How Long Does Embroidery Digitizing Take?
The turnaround time depends on the complexity of the design and the service provider.
Simple designs may be completed quickly, while complex designs may take more time. Rush services may also be available for urgent orders.
Before ordering, it is helpful to provide:
- Your artwork
- Required size
- Machine format
- Fabric type
- Placement area
- Any special instructions
Providing complete details helps the digitizer complete the file faster and more accurately.
What Information Should You Provide for Embroidery Digitizing?
To get the best results, provide clear information when ordering embroidery digitizing.
You should provide:
- Artwork or logo file
- Required embroidery size
- Machine file format
- Fabric type
- Placement area
- Thread color requirements
- Cap or flat embroidery use
- Any special instructions
Example:
“I need this logo digitized for a left chest embroidery, 3.5 inches wide, PES format, for polo shirts.”
Or:
“Please digitize this design for cap front embroidery, DST format, 4.5 inches wide.”
The more details you provide, the better the final embroidery file will be.
Best Fabrics for Embroidery Digitizing
Embroidery can be done on many fabrics, but each fabric behaves differently. The digitizing settings may need to change depending on the material.
Common embroidery fabrics include:
- Cotton
- Polyester
- Denim
- Fleece
- Towels
- Caps
- Jackets
- Polo shirts
- Hoodies
- Canvas
- Leather
- Stretch fabric
For example, towel embroidery may need stronger underlay to stop stitches from sinking into the fabric. Stretchy fabric may need special stabilization and pull compensation. Caps may need center-out digitizing to reduce distortion.
This is why fabric information is important when ordering digitizing.
Beginner Tips for Better Embroidery Results
Here are some useful tips for beginners:
Use High-Quality Artwork
The better the artwork, the easier it is to create a clean embroidery file. Clear logos and vector files usually produce better results.
Choose the Correct File Format
Make sure the final embroidery file matches your machine. For example, Brother machines usually use PES, while Janome machines usually use JEF.
Provide the Exact Size
Do not resize embroidery files too much after digitizing. Always request the correct final size.
Test Before Full Production
Always test the file before stitching on expensive garments or bulk orders.
Use the Right Stabilizer
Stabilizer supports the fabric during stitching. The wrong stabilizer can cause puckering or poor results.
Avoid Very Tiny Text
Small text can be difficult to embroider. Keep lettering large enough for clean stitching.
Work With a Professional Digitizer
A professional digitizer can create a file that is suitable for your machine, fabric, and design type.
Frequently Asked Questions
What does embroidery digitizing mean?
Embroidery digitizing means converting artwork into a machine-readable stitch file that an embroidery machine can use to sew the design on fabric.
Can I use a JPG or PNG for embroidery?
No. JPG and PNG files are image files. They must be digitized into embroidery file formats like DST, PES, JEF, EXP, VP3, or HUS before they can be stitched.
Is embroidery digitizing hard?
Embroidery digitizing requires skill, experience, and professional software. Basic designs may be simple, but high-quality digitizing takes practice and knowledge of stitches, fabric, density, and machine behavior.
What is the best file format for embroidery?
The best format depends on your machine. Common formats include DST for commercial machines, PES for Brother and Baby Lock, JEF for Janome, EXP for Bernina or Melco, and VP3 or HUS for Viking and Pfaff.
Why does my embroidery design look bad after stitching?
The design may look bad because of poor digitizing, wrong density, incorrect underlay, wrong stabilizer, unsuitable fabric, or excessive resizing.
Can embroidery digitizing be resized?
Small resizing may be possible, but major resizing can damage stitch quality. It is better to request the file in the exact size you need.
What is logo digitizing?
Logo digitizing is the process of converting a business or brand logo into an embroidery stitch file for machines.
Do I need digitizing for every new design?
Yes. Every new design must be digitized before it can be stitched by an embroidery machine. However, once a design is digitized, you can use the file again for the same size and similar fabric.
Final Thoughts
Embroidery digitizing is the foundation of high-quality machine embroidery. It turns normal artwork into a machine-ready stitch file that controls how the embroidery machine sews the design.
A good digitized file helps produce clean stitches, smooth edges, proper density, fewer thread breaks, and a professional final result. A bad file can cause rough embroidery, fabric puckering, thread breaks, and wasted garments.
For beginners, the most important thing to understand is that embroidery digitizing is not just file conversion. It is a skilled process that requires knowledge of stitches, fabric, machine formats, underlay, density, and design structure.
Whether you need a logo for uniforms, a cap design, a patch, or a custom artwork file, professional embroidery digitizing helps make sure your design is production-ready and machine-friendly.
Call to Action
Need your logo or artwork converted into a clean embroidery file? MAG Digitizing provides professional embroidery digitizing services for all major machine formats, including DST, PES, EXP, JEF, VP3, HUS, and more.
Send your design today and get a high-quality, machine-ready embroidery file prepared for smooth and professional stitching.